11:16
Lightroom Mobile
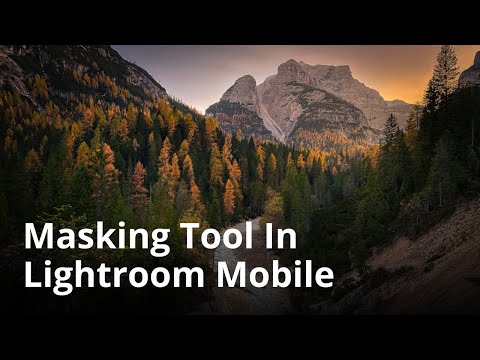
Masking — automatically isolating a photo's subject with Select Subject, then applying inverted and non-inverted local adjustments (brightness, color temperature, texture/clarity/dehaze, sharpening, vignette) — is presented as the single most powerful tool in Lightroom Mobile for making a subject stand out, because the human eye is involuntarily drawn to whatever is brightest and warmest in a frame.
A mask lets you apply (or exclude) an adjustment to one part of an image rather than the whole image, and masks can be inverted to target everything except the selected area.
Masking is called "the single biggest reason to bring your photos into Lightroom Mobile in the first place."
Select Subject is presented as the most important masking option: it auto-detects the subject and instantly builds a mask for local adjustments.
Masking is only available to paid Adobe Lightroom subscribers, not free users.
Because the human eye is drawn to whatever is brightest, if the subject is already at max brightness the fix is to invert the mask and darken the background instead of trying to brighten the subject further.
The human eye is also drawn to whatever is warmest, so the video pairs a warm-subject mask with a cooled, inverted background mask to reinforce where the viewer looks.
Texture, Clarity, and Dehaze are applied to the subject mask in a specific descending order/intensity (more texture than clarity, more clarity than dehaze).
Sharpening (via the Detail slider) is applied only to the masked subject, not globally, specifically to make that area "stand out," and the editor recommends zooming in whenever sharpening.
Lightroom Mobile stacks and remembers multiple masks per image, and shows a black-and-white preview of each mask where white marks the affected area.
A vignette (with its Midpoint control) is used after local masking to further pull the viewer's eye toward the center of the frame.
After local (masked) edits, global tweaks are made: a slight exposure decrease, a contrast increase, a whole-image Dehaze push, and a small Vibrance boost, in that order.
Pushing Dehaze too far introduces "unnatural color," per the editor's own on-camera observation while dialing it in.
Masking (local adjustment) — An adjustment applied to a specific part of an image rather than the whole image, which can also be inverted to affect everything except that part. Apply: Tap "Masking" at the bottom of the edit screen, tap the plus icon, choose a mask type, then move sliders to apply adjustments only within the masked area.
Select Subject — An auto-mask option that automatically detects and isolates the photo's subject, instantly generating a mask. Apply: In the masking menu tap "Select subject" to auto-create a mask around the subject, then adjust sliders like Light/Exposure to see the mask take effect.
Invert Mask — A toggle that flips an existing mask so the adjustment targets everything except the originally selected area. Apply: With a mask active, tap the icon on the mask's option row and tap "Invert" to switch from editing the subject to editing the background (or vice versa).
Local luminosity contrast (brighten subject / darken background) — Using masks to make the subject the brightest part of the frame, since the human eye is drawn to whatever is brightest. Apply: Raise Exposure on the subject's mask; if the subject is already maxed out, invert the mask instead and lower Exposure on the background.
Local color-temperature contrast (warm subject / cool background) — Using warm-versus-cool color temperature between subject and background to direct the viewer's eye, since the eye is also drawn to whatever's warmest. Apply: On the subject's mask push Color > Temperature warmer (e.g., around +20); on the inverted/background mask pull Temperature cooler (e.g., -10).
Texture / Clarity / Dehaze (Effects detail stack) — Three Effects-tab sliders that add detail and local contrast, applied to the masked subject in decreasing intensity order. Apply: With the subject mask selected and zoomed in, raise Texture (~40), then Clarity (~20), then Dehaze (~10), each set lower than the previous.
Local Sharpening (Detail) — A sharpness adjustment applied specifically to the masked subject, rather than globally, to make that area stand out. Apply: Reactivate the subject's mask, open Detail, zoom in, and drag the Sharpness slider (e.g., ~50-60).
Mask stacking and mask preview — Lightroom Mobile's ability to keep track of multiple saved masks per image and display a black-and-white thumbnail preview of each, where white marks the affected area. Apply: Open the masking panel to see the stacked list of masks, tap a mask's thumbnail (a red highlight confirms selection) to reactivate it before applying more adjustments.
Vignette + Midpoint — An Effects-tab adjustment that darkens the frame's edges to pull the eye toward the center, with a Midpoint control setting how far the darkening reaches. Apply: In Effects drag Vignette slightly negative (e.g., -20), then adjust Midpoint (e.g., to 20), checking the before/after by tapping and holding "Effects."
Global exposure/contrast fine-tuning — Whole-image Light-tab tweaks made after local masking to refine overall brightness and contrast. Apply: On Light, nudge Exposure down slightly (e.g., -0.3) if the image reads too bright, then raise Contrast (e.g., to 30).
Global Dehaze — Applying Dehaze at the whole-image level (no mask active) to add extra contrast and saturation, which can introduce unnatural color if pushed too far. Apply: With no mask selected, open Effects and raise Dehaze (e.g., to 60), watching for unnatural color at higher values.
Vibrance — A Color-tab slider that increases color saturation, used as a final touch. Apply: In Color, raise Vibrance slightly (e.g., to 3) after other local and global adjustments are in place.
The core creative logic isn't just "apply a mask" — it's using masking to engineer contrast (brightness and warmth) between subject and background so the eye is drawn there involuntarily, without the viewer consciously noticing direction.
When a subject can't be pushed any brighter (already near max), the workaround taught is to invert the same mask and lower everything else instead of fighting a ceiling on the subject itself.
Two separate Select Subject masks are layered with opposite settings on the same image — one inverted (for background darkening/cooling) and one non-inverted (for subject warming/sharpening) — showing masks are meant to be composed, not used once.
The texture > clarity > dehaze dosage rule (each slider pushed a bit less than the previous) is offered as the presenter's personal habitual technique ("typically the way I apply these sliders"), not a Lightroom-enforced order.
Sharpening is reframed here from a routine image-quality step into a deliberate compositional tool — applied locally via mask specifically to draw the eye, not to sharpen the whole photo.
«Now, this is such a powerful concept, and this is the single biggest reason to bring your photos into Lightroom Mobile in the first place.»
— 00:05
«So a mask simply means a affect part of the image, but not all of it.»
— 00:15
«Now it is worth mentioning that masking is one of those options that is only available if you're a paid subscriber to Adobe Lightroom.»
— 01:15
«It's because the human eye cannot help but look at whatever is brightest in the frame.»
— 03:46
«The human eye will also go to whatever's warmest in the frame.»
— 03:59
«typically the way I apply these sliders, I usually do a little bit more texture than clarity and a little bit more clarity than dehaze.»
— 05:59
«Whatever is white inside that mask is where that mask is being applied or what's being affected as we move those sliders.»
— 06:43
«just focus the eye even more towards the middle of the frame.»
— 07:48
Reception
Viewers enthusiastically praise the tutorial's clarity and helpfulness, with consistent appreciation and requests for more similar content.
A tightly scoped, hands-on walkthrough that demonstrates a repeatable masking workflow live on one image and clearly explains the perceptual rationale (brightness/warmth draw the eye) behind each move; it is explicitly a free promotional preview funneling viewers toward the paid iPhone Editing Academy course.
11:16